Configure M2 Hardware Raid from UCS Central
Contents
Introduction
Prerequisites
Requirements
Components Used
Background Information
Configure
Check Current Status
Create Disk Group Policy on UCS Central
Create a Storage Profile
Associate to a Global Service Profile
Verify
Troubleshoot
Related Information
Introduction
This document describes how to configure the Unified Computing System (UCS)-M2-HWRAID in UCS
Central Management Software.
Prerequisites
Requirements
Cisco recommends you have knowledge of these topics:
UCS Manager•
UCS Central•
M2 Raid UCS-M2-HWRAID•
Components Used
The information in this document is based on these software and hardware versions:
Cisco UCS 64108 108-Port Fabric Interconnect in Ethernet and Fibre Channel End Host Mode•
Infrastructure bundle version: 4.2(3)•
Cisco UCS B200 M6 Server•
Server firmware version: 4.2.3(b)B•
More: UCS Hardware and Software Compatibility
Adapters > RAID > Cisco Boot Optimized M.2 HW Raid Controller (Cisco)
○
•
The information in this document was created from the devices in a specific lab environment. All of the
devices used in this document started with a cleared (default) configuration. If your network is live, ensure
that you understand the potential impact of any command.
Background Information
The UCS-M2-HWRAID holds two m.2 gumsticks; one on each side of the carrier. The UCS-M2-HWRAID
and UCS-MSTOR-M2 look similar, but in this configuration example, hardware RAID.
Configure
Check Current Status
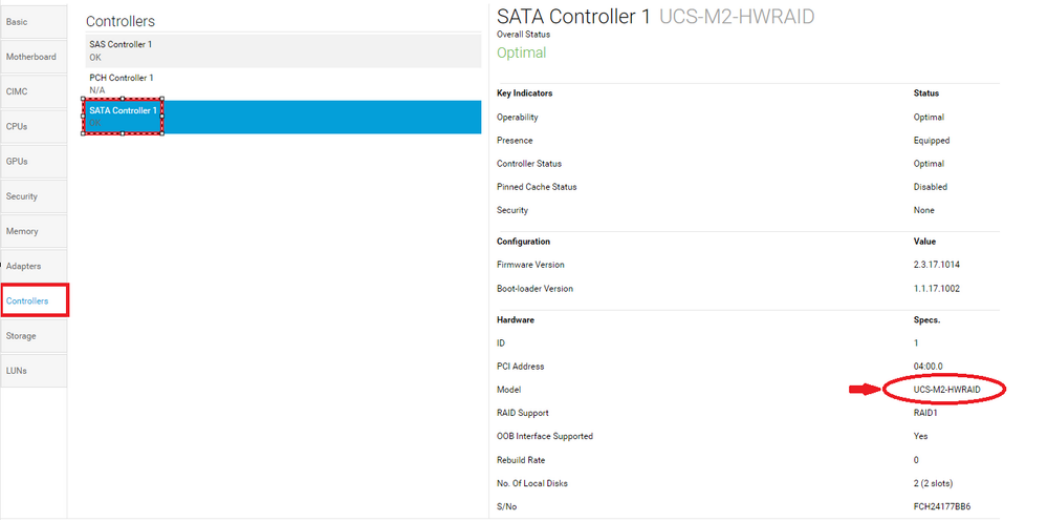
Check that the necessary parts are shown at server inventory.1.
In UCS Central, navigate to Equipment > Servers > Server x.
Select the Inventory tab at the top, Motherboard. Expand Mini Storage. Ensure that your Model shows
as UCS-M2-HWRAID as shown in this image.
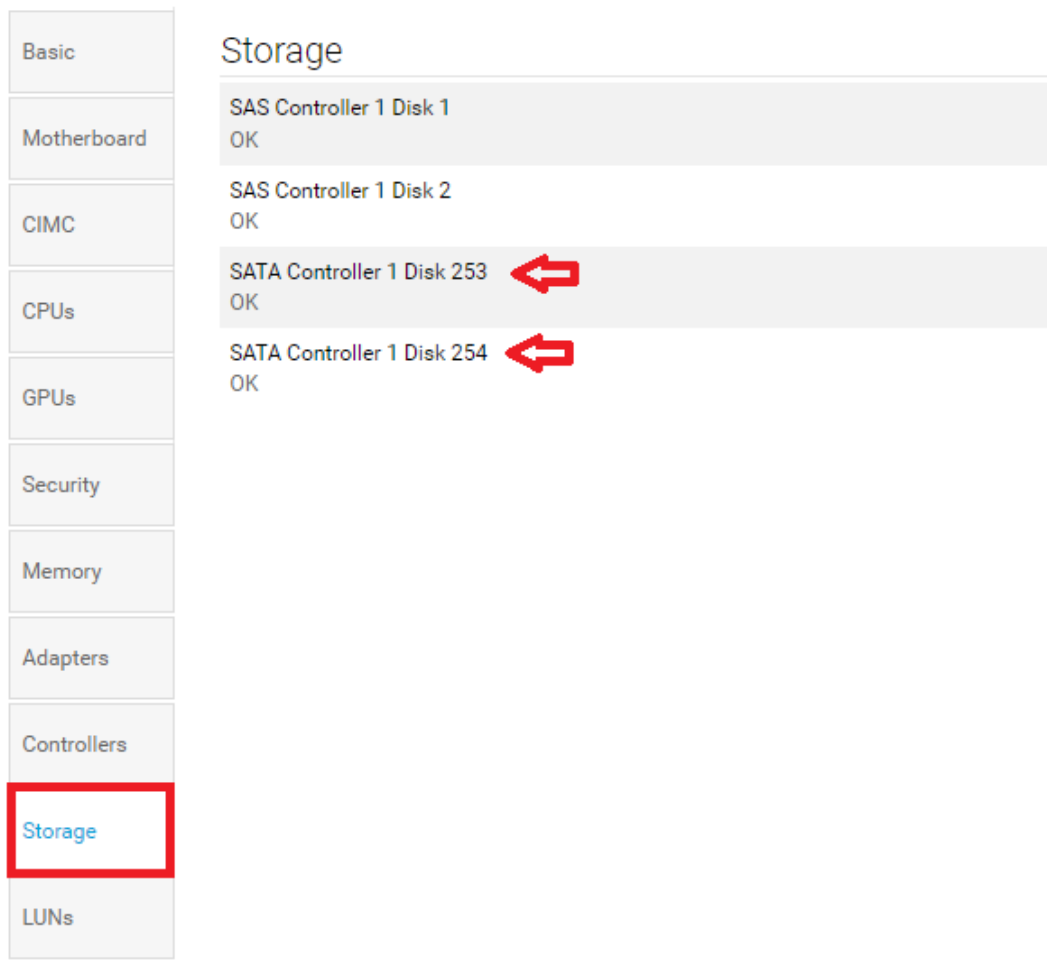
2. Check that two m.2 disks are presented, and are in operable state. This server model places m.2 disks in
slots 253 and 254.
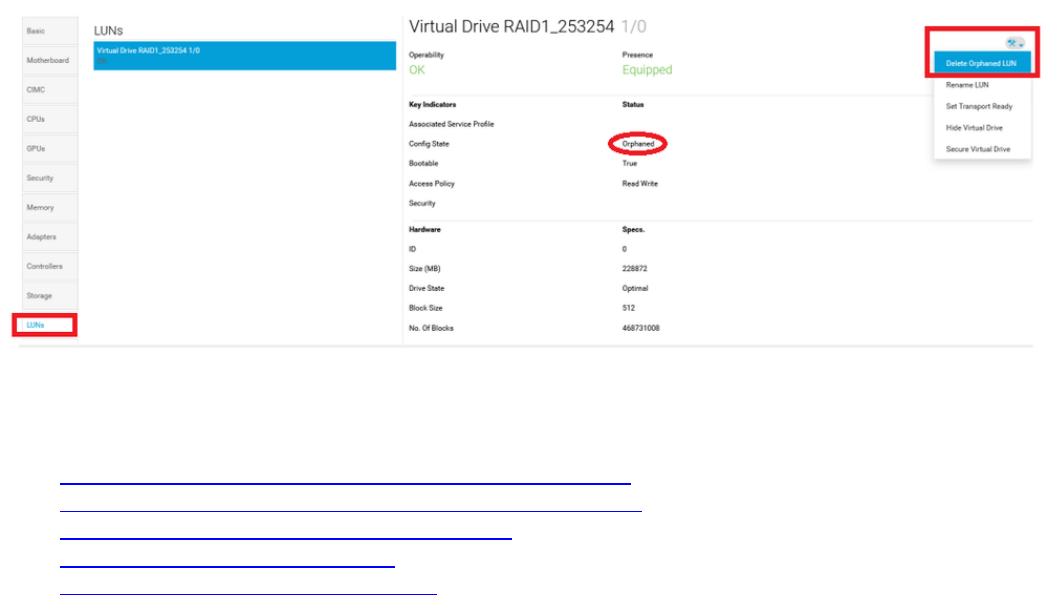
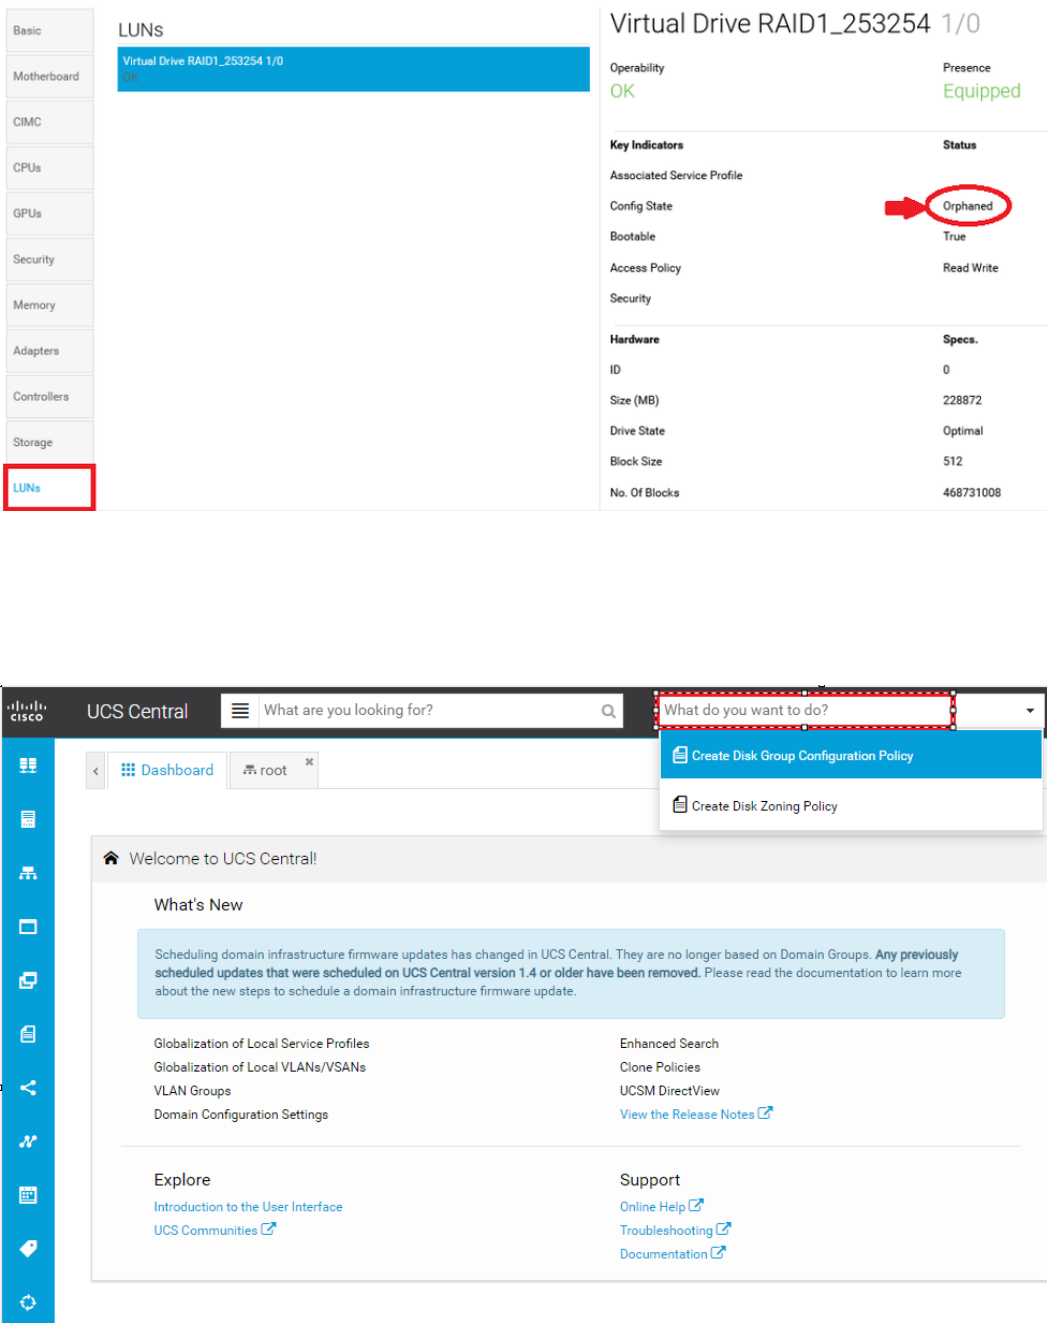
3. Check for any orphaned LUN:
Navigate to LUNs Tab. If you see an orphaned LUN, skip to the Troubleshooting section at the bottom
before you begin the configuration.
Create Disk Group Policy on UCS Central
1. On UCS Central, navigate to box What do you want to do? and type Create Disk Group
Configuration Policy.
2. Select the organization, name the policy, add description, and select RAID Level 1 Mirrored.
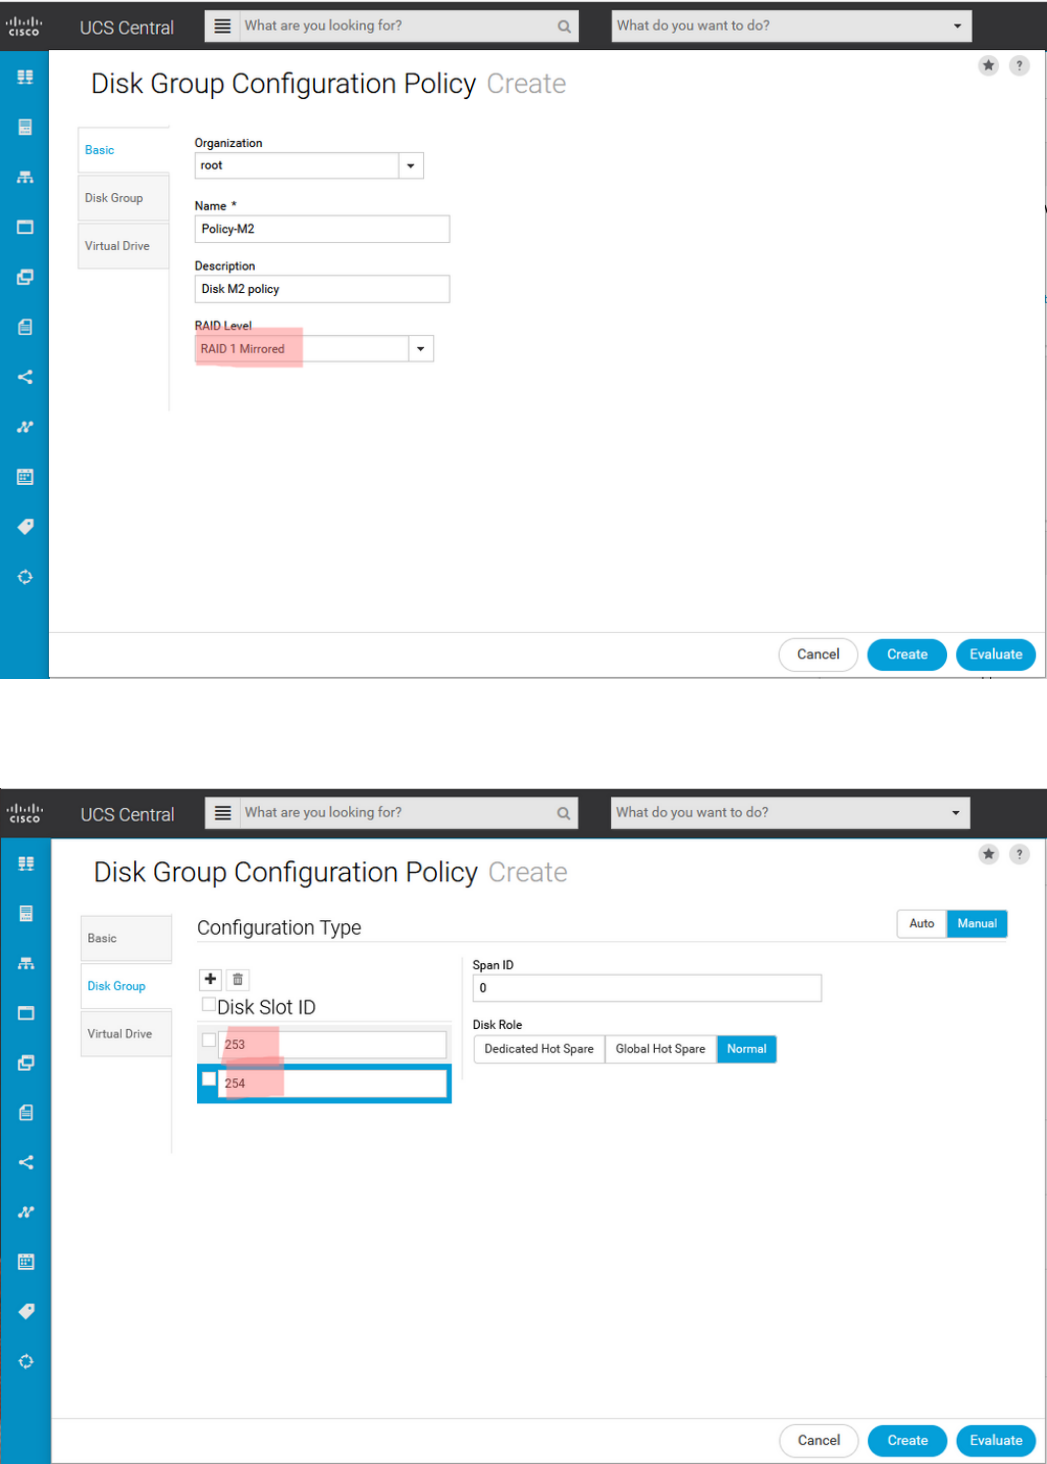
3. Select Disk Group. Under Disk Slots IDs, type 253 and 254 for the Disk IDs for this case, and then
select normal Disk Roles.
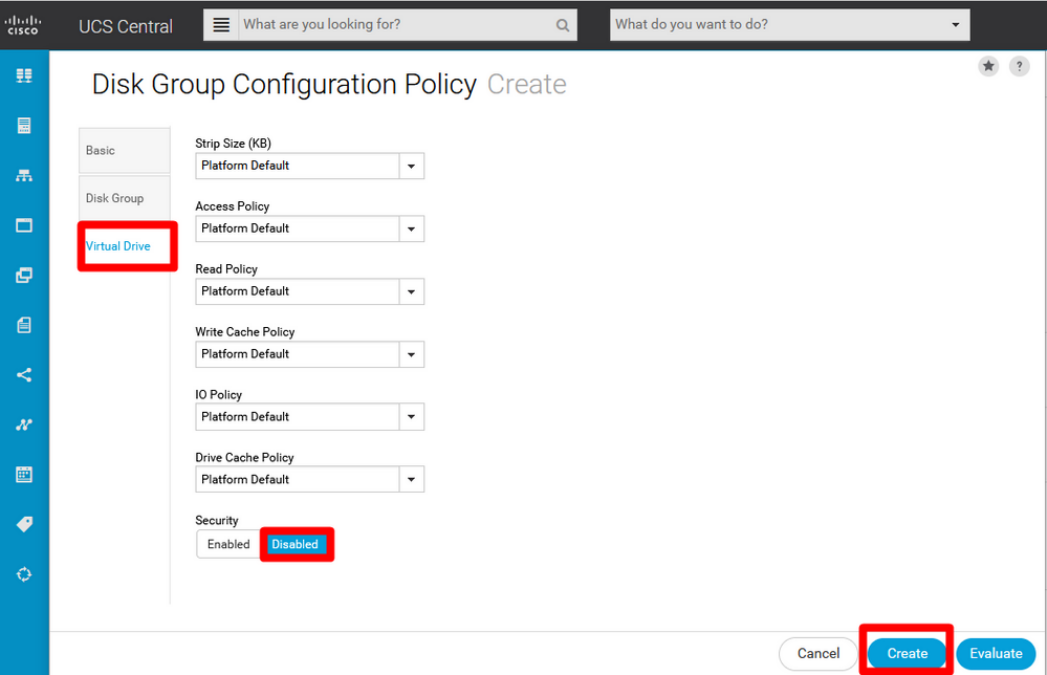
4. Select Virtual Drive, and confirm that all options are on Platform Default, and that Security is Disabled.
Then, click the Create button.
Create a Storage Profile
1. On UCS Central, navigate next to search box What are you looking for? and type Create Storage
Profile.
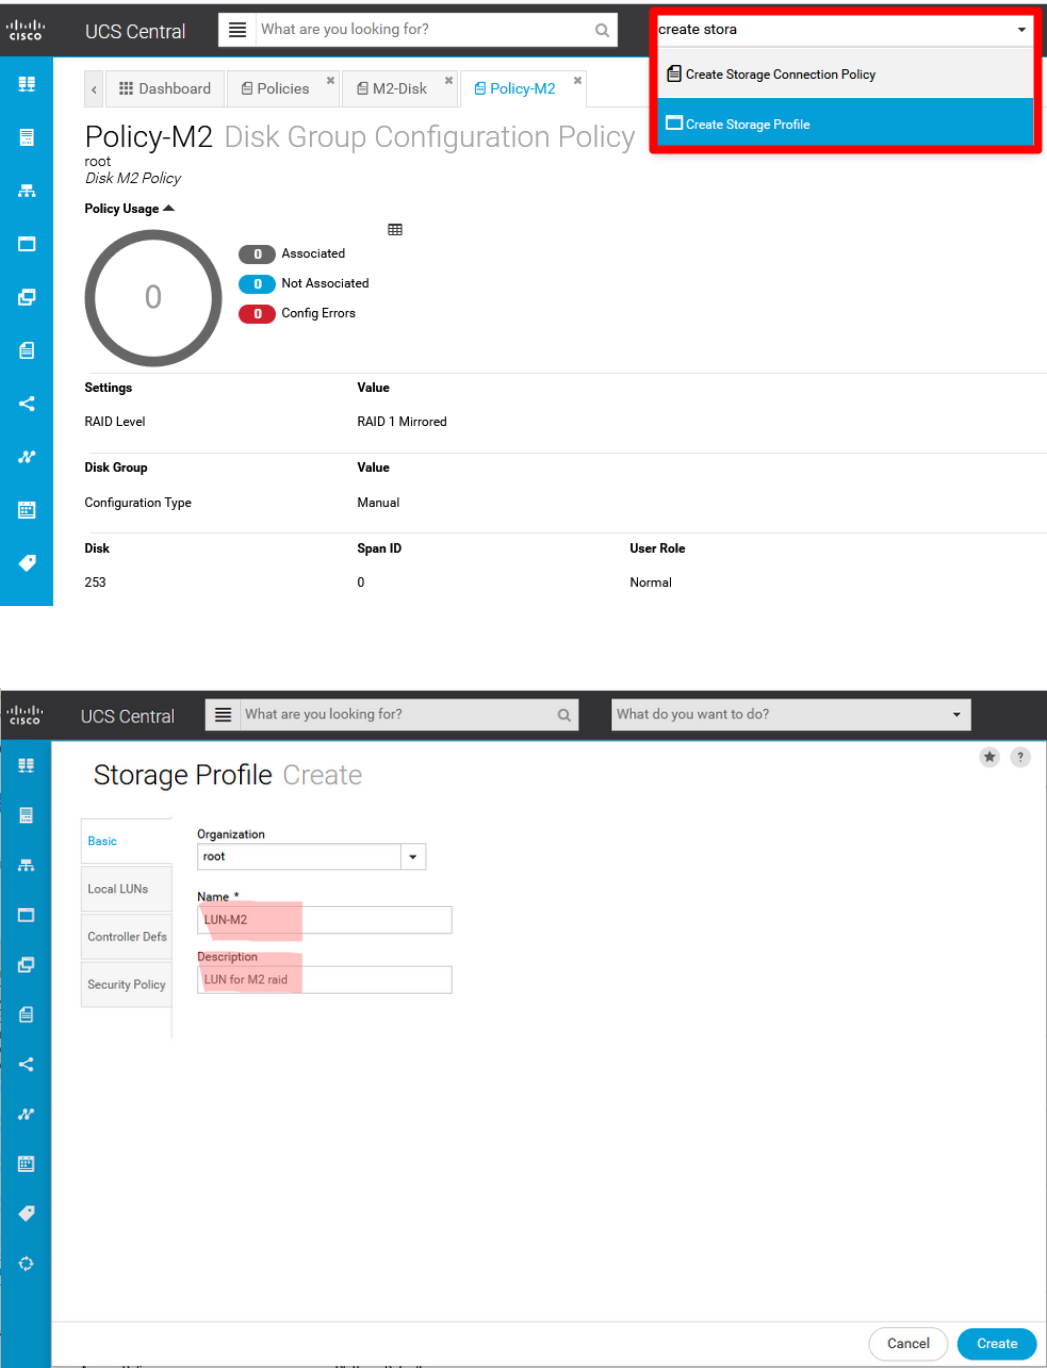
2. Name the storage profile and add a description.
3. Select Local LUNs, then click Add button and give name to this LUN.
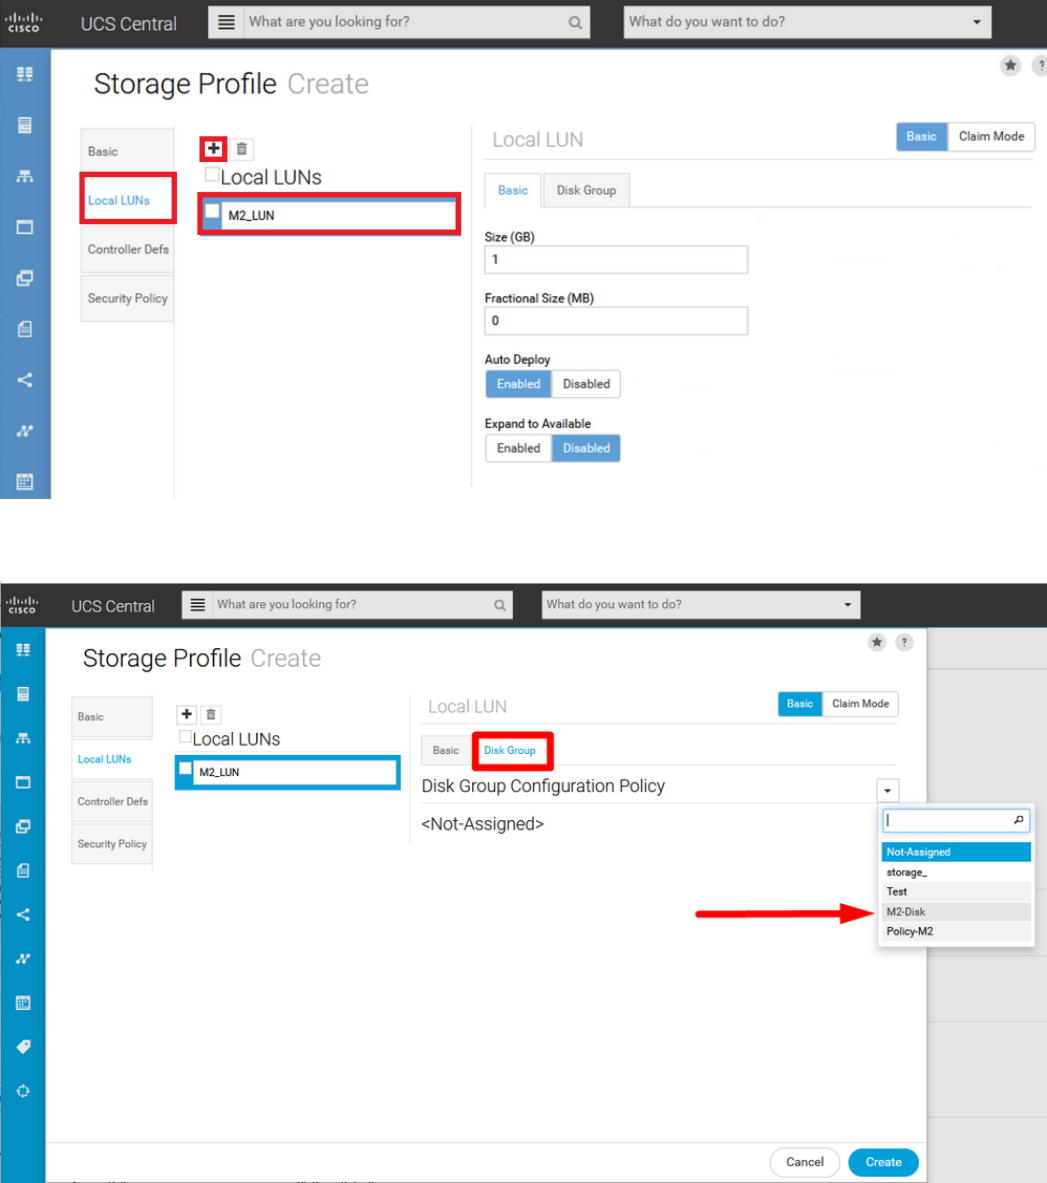
4. Click Disk Group. Click drop-down arrow and select previously created Disk Group Policy.
5. Controller Defs and Security policy are not required for M.2 Raid controllers. Complete configuration by
selecting Create.
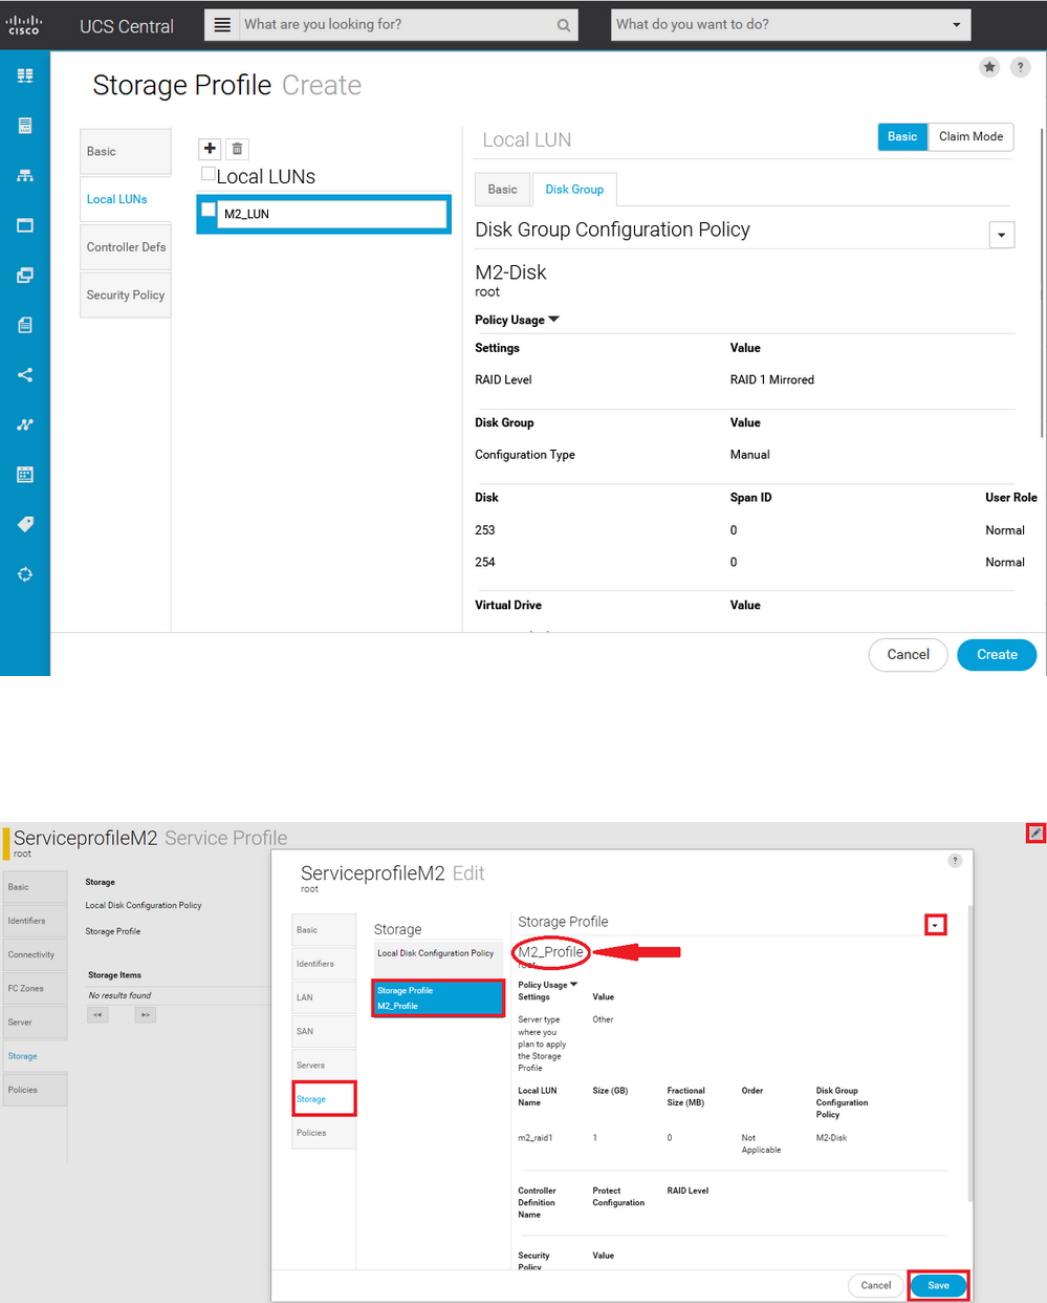
Associate to a Global Service Profile
1. Apply the recently created Storage Profile to a new or existing service profile, and Save configuration.
2. In case service profile is not associated yet, proceed to assign Service Profile to an existing Server.
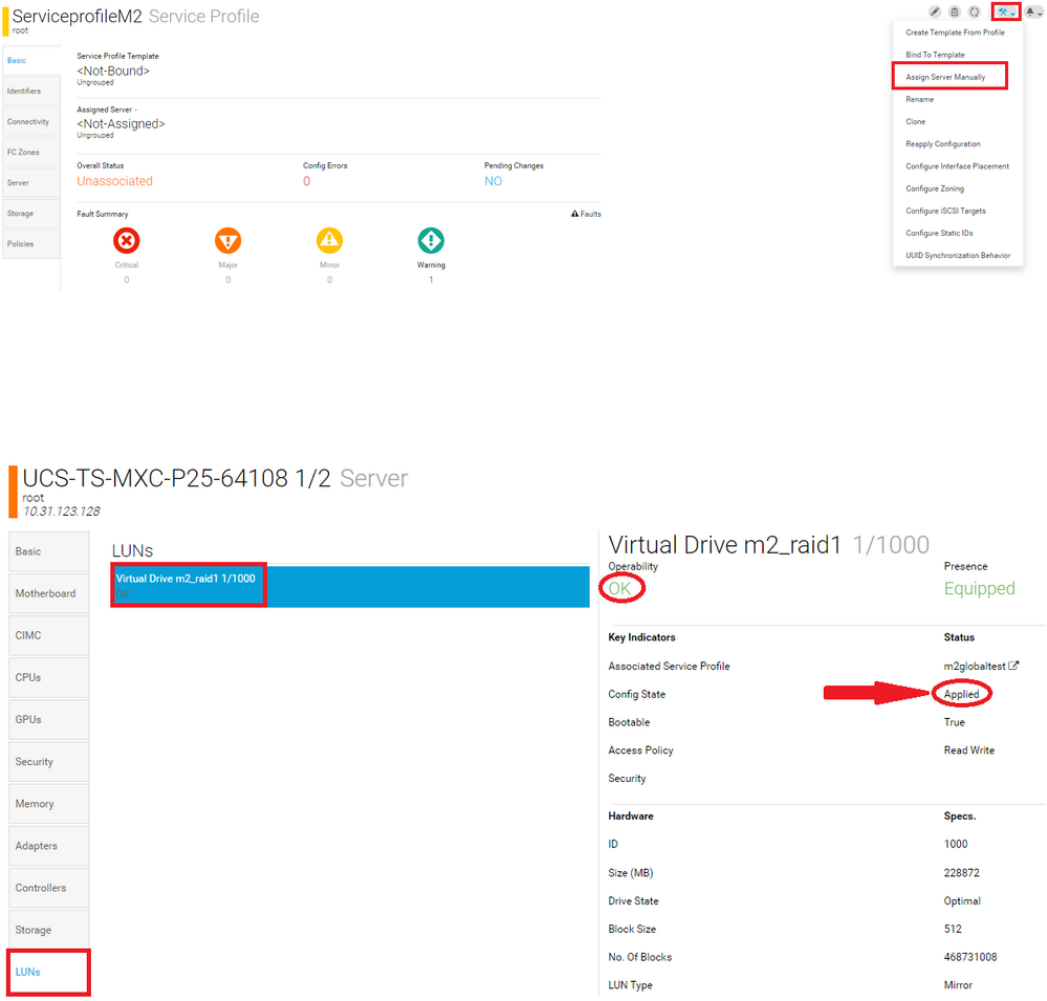
Verify
Check ServerTab, then select LUNs and make sure Virtual Drive exists and configure state is applied.
Troubleshoot
This section provides information you can use in order to troubleshoot your configuration.
When an orphaned LUN is found, select the LUN andDeleteit. This removes any and all data that exists on
the array as shown in this image.